widget-dev-demo 组件配置器的具体代码请参考 configurator。
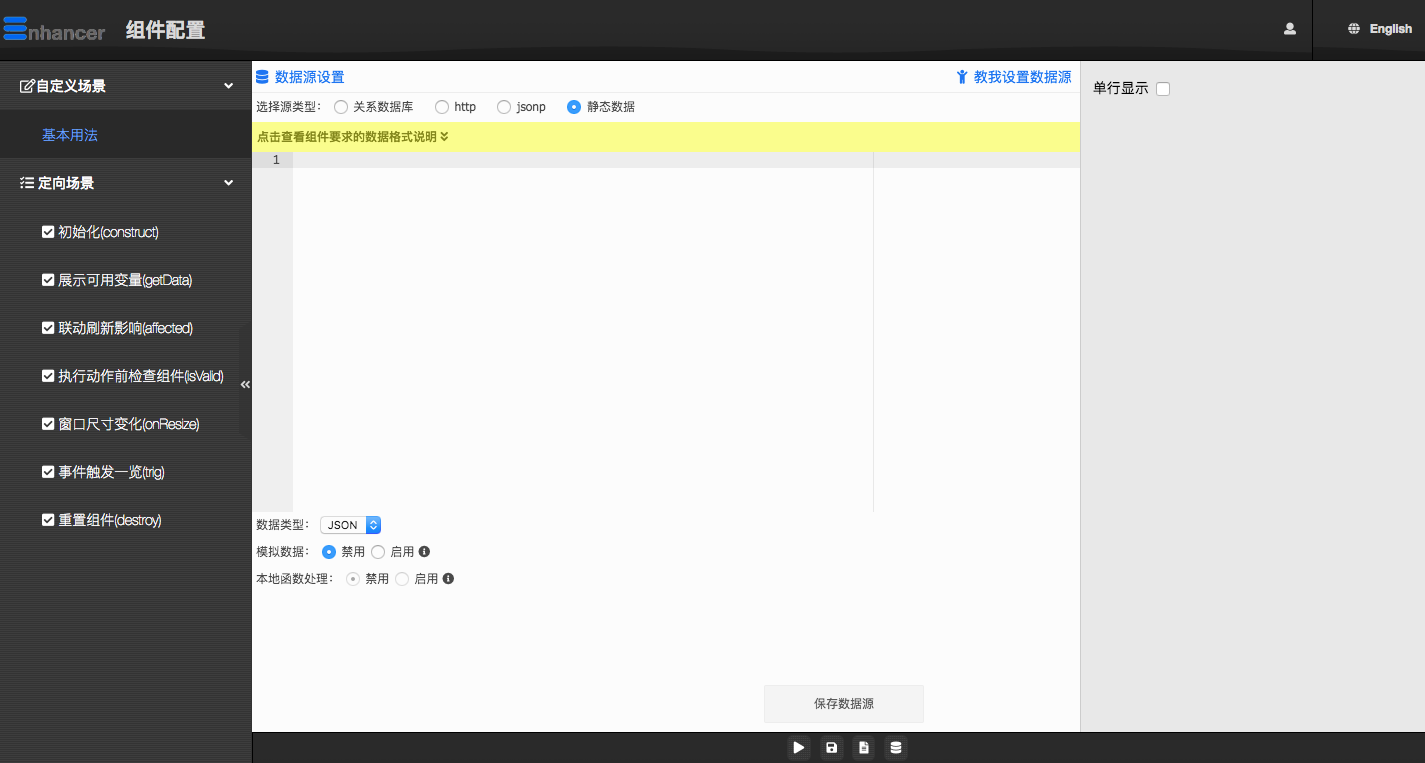
开发完成后的效果
下面介绍一下主要步骤:
1. 在 construct 函数里初始化 html 元素
const tplHTML = template({
  locale: locale()
});

$('body').html(tplHTML);

// 初始化数据源配置器
this.dataSourceConfig = Enhancer.DatasourceManager.createConfigurator('dataSourceDom', {
  supportedTypes: ['rdb', 'http', 'static', 'jsonp'],
  dataSpecification: 'dataSpecification', // 组件数据格式说明
  onSave: (source) => {
    this.profile.dataSourceId = source.id;
  }
});
2. 在 setProfile 函数里回填之前保存过的配置项
// 用保存过的数据源Id区加载数据源, 然后回填给数据源配置器
if (this.profile.dataSourceId) {
  Enhancer.DatasourceManager.getDatasource(this.profile.dataSourceId, (source) => {
    this.dataSourceConfig.setConfig(source);
  });
}

// 回填 单行显示 配置项
if (this.profile.oneLine) {
  $('input[name=oneLine]').prop('checked', true);
}
3. 在 getProfile 函数里检查配置的合法性并返回新的配置数据
由于 widget-dev-demo 组件只有一个 数据源 配置项和一个 单行显示 的配置项, 因此 getProfile 函数只会返回这两个字段。
return {
  dataSourceId: this.profile.dataSourceId,
  oneLine: $('input[name=oneLine]').prop('checked')
};
配置器至少要实现 setProfile 和 getProfile 这两个接口函数